|
import jm.JMC;
|
In order to use the awt classes we need to import two packages- java.awt.*; and java.awt.event.*; The awt package has the classes for windows buttons and so on, and the awt.event package has classes for handling mouse clicks on the buttons, movement of the sliders, and so on.
public class JM550b extends Frame implements JMC, ActionListener { |
In the class declaration there are two important things to notice regarding the awt GUI. Firstly, the class extends the Frame class (java.awt.Frame) which allows this class to be a window. Secondly, it implements the ActionListener (java.awt.event.ActionListener) to capture and handle user interaction with the GUI.
After declaring the class two class variables are declared - two buttons which will be used to start and stop playback.
The main() method calls the constructor which draws the GUI (more about that below), then creates an instance of the EightBeat1 class which creates a drum pattern, and thridly the playback() method (which EightBeat1 inherited from Basic_550) is invoked, which does the obvious thing - hopefully starts playing the drum pattern over and over!
public JM550b() { |
In the constructor all the GUI setup work is done.
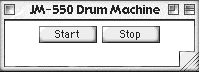
super("JM-550 Drum Machine"); is a call to run the constructor of the Frame class, which is the super class of JM_550b because it extends it. It creates a framed window with the title "JM-550 Drum Machine".
A Panel is an awt class than is a blank area on which other componenrts can be put. A Panel instance called transport is created.
Two button objects are created. One is given the name and title "Start" and the other the name and title "Stop". Each is registered with the ActionListener by calling the button's addActionListener() method. The argument 'this' passed to that method indicates that the actions will be dealt with by a method in THIS class, i.e. the JM_550b class. (See below). Each button instance is added to the panel.
The panel (now with its buttons) is added to the framed window with the line.
this.add(transport);
The keyword 'this' again refers to THIS class, the JM_550b class - which as you know IS an instance of Frame, because it extends the Frame class thus inherting the ability to be a window.
Finally, this frame is packed (i.e. made as small as reasonable), and made visiable to the user.
public void actionPerformed(ActionEvent ae) { |
To deal with clicks on the start and stop button we add functionality to the actionperformed() method. This method must be used whenever we implement the ActionListener interface.
The method is called automatically each time a user clicks on a button registered to the ActionListener - which our two buttons are.
When called we check to see which button was clicked and make appropriate calls our pat (which is an instance of EightBeat1, which in turn is an extension of Basic_550). These buttons do the obvious thing: start and stop the drum loop from playing. Note that to avoid multiple streams of play, when the play button is clicked the Play class is checked to make sure nothing is already playing. If nothing is playing, the the playback method will be invoked.
We now have a simple and somewhat groovy drum machine :)
Move on to the next tutorial which
adds a graphical user interface to these classes:
JM-550 Drum
Machine: AWT sliders
|
|
|
|
|
© 2001 Andrew R. Brown |
|
|